
Can You Miter Cut Ceramic Tile? A miter cut is a type of cut that’s made at an angle, usually 45 degrees. When it comes to ceramic tile, a miter cut can be used to create clean, sharp edges along the tile’s surface. While a miter saw is the best tool for making this type of cut, a handheld tile cutter can also be used.
Here’s a step-by-step guide to help you get started.
- Measure and mark the tile where you will make the miter cut
- Use a wet saw to make the cut, following the line you marked on the tile
- Smooth any rough edges on the tile with a file or sandpaper
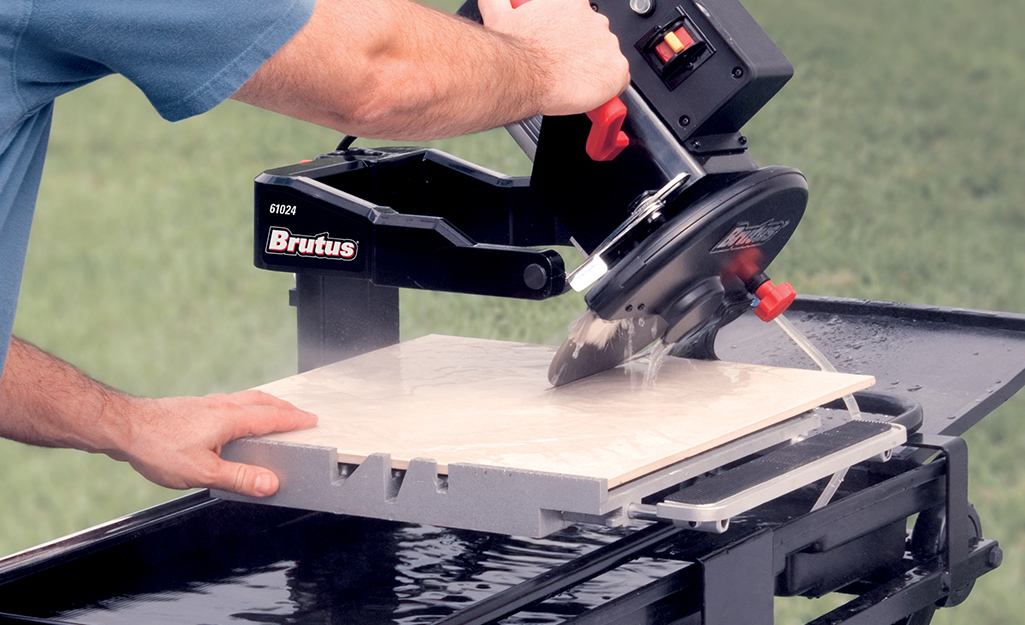
Credit: www.homedepot.com
Can I Use a Miter Saw to Cut Ceramic Tile?
If you’re looking to do a quick project and need to cut ceramic tile, then a miter saw is a great option. You can use a wet saw with a blade designed for cutting tile or a standard miter saw. Just be sure to use plenty of water to keep the blade cool and prevent chipping.
Here are step-by-step instructions for using a miter saw to cut ceramic tile:
1. Mark your tiles. Use a pencil or other sharp object to mark where you need to make your cuts. It’s important to be as precise as possible so that your cuts are clean and straight.
2. Set up your miter saw. Make sure the blade is properly secured and positioned at the correct angle before turning on the power.
3. Cut slowly and steadily. Apply even pressure as you guide the blade through the tile. Don’t try to force it through too quickly or you risk breaking the tile or damaging the blade.
4. Clean up any debris afterward. Use a brush or vacuum cleaner to remove any dust or particles created by cutting the tile.
How Do You Cut Mitered Edges on Tile?
Mitered edges on tile can give your tile installation a professional, finished look. But if not done correctly, mitered edges can be weak and susceptible to chipping. Here are some tips on how to cut mitered edges on tile:
First, you’ll need to mark the tile where you want the miter cut. Use a pencil or other sharp object to score a line across the tile. You can use a ruler or straightedge to help make sure your line is straight.
Next, set up your wet saw according to the manufacturer’s instructions. Make sure the blade is properly installed and that the water reservoir is full. Put on eye protection and gloves before starting the saw.
Now it’s time to make the cut. Guide the tile slowly into the blade, following your marked line. Keep your hands away from the blade as it cuts through the tile.
Once you’ve made it all the way through, turn off the saw and let it cool down before removing your piece of tile. If done correctly, mitered edges on tile can give your project a polished look. Be careful when cutting through – improper technique can lead to weak joints or chipped tiles!
How Do You Miter Porcelain Tile Without Chipping?
When cutting porcelain tile, it’s important to use a diamond blade wet saw. A regular blade will chip the tile. Also, be sure to score the tile before making your cut.
This will help prevent any chipping as well.
Can You Cut Porcelain Tile at 45 Degree Angle?
When it comes to cutting porcelain tile, you can definitely cut it at a 45-degree angle. In fact, this is actually one of the most popular ways to cut porcelain tile. Some people even prefer to cut it at a 45-degree angle because it gives the tile a more finished look.
Plus, cutting porcelain tile at a 45-degree angle is actually quite easy to do. All you need is a wet saw and a few simple tools.
How to MITER CUT tile like a PRO!!!
How to Mitre Tiles Without Chipping
Tiling can be a great way to update the look of your home, but it can be tricky to get the hang of. One of the most challenging aspects of the tiling is creating clean, sharp lines where two pieces of tile meet. This is called a miter, and it’s essential for getting a professional-looking finish.
Fortunately, there are a few tricks you can use to make sure your miters come out perfect every time. First, always use a tile saw to make your cuts – this will give you the cleanest possible edge. Second, when cutting your tiles, always err on the side of making the cut too shallow rather than too deep – it’s much easier to deepen a cut than it is to try and fix a chipped tile.
Finally, when putting your tiles in place, use plenty of adhesives and take care not to jar them as you’re working – this could cause them to crack or chip. With these tips in mind, you’ll be able to create beautiful, professional-looking miters that will add the perfect finishing touch to your tiled project!
Miter Tiles
Miter tiles are an essential part of any tiling project. They are used to create clean, sharp corners and edges. Without them, your tile job would look unfinished and sloppy.
There are two types of miter tiles: bullnose and beveled. Bullnose miter tiles have a rounded edge, while beveled miter tiles have a chamfered (angled) edge. Both types of miter tiles are available in a variety of colors and materials to match your tile installation.
To install miter tiles, you will need to use a wet saw with a diamond blade. Make sure to wear eye protection and gloves when operating the wet saw. When cutting the miter tiles, it is important to make sure that the cuts are perfectly square.
Any imperfections will be magnified once the miters are installed. Once the miters are cut, they can be installed using thin-set mortar or construction adhesive. For a more permanent installation, use thin-set mortar; for a temporary installation or repair, use construction adhesive.
If using construction adhesive, be sure to apply it evenly to both surfaces before pressing the pieces together firmly. Allow the adhesive to dry completely before grouting the joint between the two pieces of tile.
Tile Mitre Resin
A tile miter resin is a type of adhesive that is used to attach two pieces of tile together at an angle, typically at the corners of a room. This type of resin is available in both water-based and solvent-based formulas, and it is important to choose the right formula for the job at hand. Water-based formulas are typically easier to work with and clean up, but they may not be as strong as solvent-based formulas.
Solvent-based formulas, on the other hand, are more durable and provide a stronger bond, but they can be more difficult to work with and clean up.
Can You Miter Porcelain Tile
If you’re looking to add a touch of luxury to your home, miter porcelain tile is a great option. This type of tile is made from high-quality porcelain, making it durable and beautiful. Plus, its glossy surface can help reflect light and make any room look brighter.
When it comes to installation, miter porcelain tile can be tricky. That’s because the tiles are usually larger and heavier than standard ceramic tiles. As a result, you’ll need to take extra care when cutting and installing them.
But with a little patience and the right tools, you can achieve professional results. Here are some tips for mitering porcelain tile:
1. Use a wet saw with a diamond blade designed for cutting porcelain tile. This will help prevent the tiles from cracking or chipping during the cutting process.
2. Make sure the area where you’ll be working is level before starting to cut the tiles. Use a spirit level or laser level to check for unevenness.
3. When making cuts, always use slow, steady strokes. Avoid forceful or jerky movements, which could cause the tiles to crack or chip.
4. After making each cut, wipe away any debris from the blade immediately so it doesn’t get transferred onto other tiles. If necessary, apply water to cool down the blade between cuts.
5. Once all of your pieces are cut, start installing them from the center of the area outward. Make sure each piece is properly aligned before moving on to the next one.
6 . To avoid grout lines that are too thick or thin, mix up small batches of grout at a time and apply it with a rubber float held at about a 45 – degree angle.
How to Mitre Tiles With a Grinder
A miter tile grinder is a tool specifically designed to cut tiles at a 45-degree angle. This type of grinder is handheld and relatively easy to use, making it a popular choice for do-it-yourselfers and professionals alike. Here are the steps necessary for mitering tiles with a grinder:
1. Begin by drawing a line on the tile where you will make your cut. A pencil or chalk works well for this purpose.
2. Next, set the depth of the blade on the grinder so that it will only cut through about half of the tile thickness. This will help to prevent chipping or breaking the tile as you make your cut.
3. With the depth set, position the blade of the grinder at an angle so that it lines up with your marked line on the tile surface. Slowly begin cutting along the line, applying even pressure as you go. Remember to keep your fingers clear of the blade!
4. Once you’ve made it all the way around your marked line, stop and check your work to make sure that you have a clean, consistent cut all along both edges of the tile. If not, simply adjust your grip on the grinder and/or your pressure as needed and go back over any areas that need more attention until you’re happy with the results.
Tile Miter Jig
If you’re looking for a quick and easy way to create perfect miters on your tile, then you need a tile miter jig! A tile miter jig is a simple tool that helps you make clean, precise cuts on your tile. Here’s how it works:
First, you’ll need to measure the length of the tile that you want to cut. Then, you’ll use the jig to mark where you want to make your cut. The jig has a stop block that allows you to line up the tile perfectly before making your cut.
Once you’ve made your cut, simply remove the stop block and move on to the next tile! With a little practice, you’ll be able to create perfect miters every time – quickly and easily!
Conclusion
If you’re considering tackling a ceramic tile project yourself, you might be wondering if you can miter cut the tile. The short answer is yes, but it’s not as easy as cutting wood. In this blog post, we’ll walk you through the process of miter cutting ceramic tile so you can decide if it’s the right method for your project.
First, you’ll need to score the glaze on the tile with a glass cutter. Next, use a wet saw to make your cuts. Make sure to wear eye and ear protection when using the wet saw.
Finally, clean up any sharp edges with a diamond hand pad.
If you’re comfortable using power tools and are looking for a way to save money on your ceramic tile project, then miter cutting is a great option. Just be sure to take your time and make precise cuts so your finished project looks professional.

I’m John Carry, also known as a woodworker I have been a professional saw expert for over 10 years. I’d work with every type of saw machine out there, and experiment to find which tools work better.
I’m always looking for ways to improve my skills and help those around me. I love my job and am always happy to share my knowledge with others.