
If you’re looking to make some home improvement changes, you may have considered cutting your baseboards to accommodate new flooring, furniture, or electrical fixtures. While there are many tools available to help you make precise cuts, one tool that has become increasingly popular among DIYers is the Dremel. The Dremel is a versatile rotary tool that can be used for cutting, sanding, grinding, and more. But can you cut the baseboard with a Dremel? The answer is yes! In this blog, we’ll explore the steps you need to take to safely and accurately cut your baseboards with a Dremel. Whether you’re a seasoned DIYer or a beginner, this guide will give you the information you need to get the job done right.
Can You Cut The Baseboard With A Dremel? And How?
Cutting baseboards with a Dremel rotary tool is a simple and straightforward process, but it’s important to take some precautions and follow a few basic steps to ensure the best results. Here’s how to cut baseboards with a Dremel:
- Gather the tools and materials you’ll need: In addition to your Dremel tool, you’ll need a cutting wheel attachment, a straight edge or square, a saw horse or other sturdy surface to support the baseboards, and safety equipment such as safety glasses and gloves.
- Prepare the baseboard: Clean the surface of the baseboard to remove any dirt or debris that could get in the way of your cutting wheel. Then, measure and mark the cut line with a pencil or chalk.
- Attach the cutting wheel: Install the cutting wheel attachment onto the Dremel tool, making sure it is securely in place.
- Secure the baseboard: Place the baseboard on a saw horse or other sturdy surface, with the cutting line facing up. Clamp the baseboard in place to prevent it from moving while you make the cut.
- Make the cut: Turn on the Dremel tool and gently guide it along the cut line, applying light pressure to the cutting wheel. Move slowly and steadily, allowing the cutting wheel to do the work for you.
- Clean up: Turn off the Dremel tool and remove the cutting wheel attachment. Dispose of any debris from the cutting process and clean the baseboard and the Dremel tool as needed.
- Sand the edge: To smooth out any rough edges, use a sanding attachment on the Dremel tool to gently sand the cut edge of the baseboard.
By following these steps, you can successfully cut your baseboards with a Dremel rotary tool. Remember to take your time, be careful, and use caution while operating the tool to ensure your safety and the best results.
Credit: www.honeybearlane.com
What Tool is Best Used to Cut Baseboards?
When it comes to cutting baseboards, there are a few different tools that you can use. The best tool to use will depend on the material of your baseboard and the type of cut that you need to make. If you have a wood baseboard, the best tool to use is a saw.
You can either use a hand saw or an electric saw, depending on what you have available and your level of experience. For straight cuts, an electric saw will be the quickest and easiest option. However, if you need to make any intricate cuts, a hand saw will give you more control.
If your baseboard is made from PVC or another type of plastic, you will need to use a power drill with a special cutting attachment. This attachment will allow you to make clean, precise cuts in the material. No matter what type of baseboard you have, always measure twice before making any cuts.
This way you can avoid any mistakes that could ruin your project.

What is the Best Way to Cut Baseboards?
If you’re looking to cut baseboards, there are a few things you’ll need to keep in mind. First, you’ll need to make sure you have the right tools for the job. A saw is essential, and a miter box can be helpful as well.
You’ll also need some painter’s tape and a level. Once you have your supplies gathered, measure the length of the baseboard you need to cut. Mark this measurement on your board with a pencil.
Then, use your miter box or saw to make cuts at each end of the board at a 45-degree angle. If you’re using a miter box, line up the blade with your mark before making your cut. After both ends are cut, it’s time to attach the baseboard to the wall.
Apply painter’s tape along the wall where the baseboard will go. This will help ensure a clean and straight install. Next, use construction adhesive or nails (if desired) to attach the baseboard to the wall.
Start at one end and work your way down until all of the baseboards is in place. Remove any excess adhesive or nail holes with putty before painting or staining as desired.
Can You Cut Baseboard With a Multi-Tool?
If you’re looking for a versatile tool that can help you tackle a variety of tasks around the house, a multi-tool is a great option. And one of the many things you can do with a multi-tool is cut the baseboard. Whether you’re installing a new baseboard or replacing an old, damaged baseboard, cutting it to size is an important step.
And while you could use a traditional saw for the job, a multi-tool can make it easier and faster. Here’s how to cut the baseboard with a multi-tool:
1. Mark the cut line on the baseboard. Use a pencil or marker to clearly mark where you need to make your cut. This will ensure that your cuts are straight and accurate.
2. Insert the blade into the marked area. Carefully position the blade of your multi-tool so that it lines up with the marked cut line. Then, gently push or pull the blade through the material to make your cut.
3. Repeat as needed.
Can You Cut Baseboards Without a Saw?
If you’re looking to add or replace baseboards in your home, you may be wondering if it’s possible to do so without a saw. The answer is yes, but there are a few things to keep in mind. Here’s what you need to know about cutting baseboards without a saw.
First, it’s important to measure the area where you’ll be installing the baseboard. This will help you determine how much material you’ll need and what size pieces to cut. It’s also a good idea to mark the location of any doors or windows so you can avoid them when cutting the baseboard.
Next, use a utility knife or another sharp tool to score the back of the baseboard along the length of each piece that needs to be cut. Be sure to make your cuts straight and even so they fit together properly when installed. Once all your details are cut, it’s time to install them.
Begin by attaching the longest piece of baseboard first, then work your way down from there. predrill holes for any nails or screws and use finishing nails or deck screws to attach each piece securely in place. And that’s it!
With these tips in mind, you can successfully install new baseboards in your home without needing a saw.
How to use a Dremel to cut into a baseboard
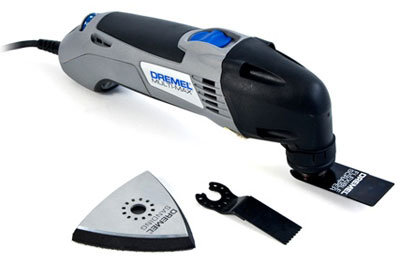
Dremel Baseboard Cutter Attachment
If you’re looking for an attachment that will make cutting baseboards a breeze, then look no further than the Dremel Baseboard Cutter Attachment. This helpful tool attaches to your Dremel rotary tool and features a guide that helps you make clean, precise cuts – perfect for creating baseboard miters. Plus, the built-in dust collector means there’s no mess to clean up afterward.
To use the Dremel Baseboard Cutter Attachment, simply position the guide against the edge of the baseboard where you want to make your cut and then follow the guide as you cut. The depth stop allows you to control how deep your cut is, so you can create perfect miters every time. And when you’re done cutting, just detach the dust collector and empty it out – it’s that easy!
Whether you’re a DIYer or a professional carpenter, the Dremel Baseboard Cutter Attachment is a must-have tool for anyone who wants to create perfect baseboard cuts with ease. So add one to your cart today and see just how much easier your next project will be!

Best Tool for Cutting Baseboards
When it comes to cutting baseboards, there are a few different tools that you can use. However, the best tool for the job is definitely a miter saw. A miter saw is a specialized tool that is designed for making precise cuts at angles.
This makes it perfect for cutting baseboards since you often need to make cuts at angles in order to fit them properly around corners. Another advantage of using a miter saw is that it can handle much longer pieces of wood than other tools like hand saws or power saws. This means that you can cut your baseboards all in one go, without having to stop and start in the middle of a cut.
If you don’t have access to a miter saw, then your next best option would be a power saw or hand saw. However, these tools are not as precise as a miter saw and require more time and effort to get clean, straight cuts.
Cutting Baseboard on Wall With Oscillating Tool
If you’re looking to cut baseboards on a wall, an oscillating tool is a way to go. This type of tool is designed to make quick, precise cuts in a variety of materials – including wood. Here’s a step-by-step guide on how to cut baseboard using an oscillating tool:
1. Mark the area where you need to make your cut. Use a pencil or pen to mark a line directly on the wall where you’ll be cutting.
2. Set up your oscillating tool. You’ll need to attach a blade that’s appropriate for cutting wood. Consult your tool’s manual for guidance on which blade to use and how to properly attach it.
3. Begin cutting along your marked line. Slowly move the blade back and forth as you guide it along the line. Keep the blade perpendicular to the wall to ensure a straight cut.
4. Cut through all layers of baseboard material. If your baseboard is multilayered (i.,e., there’s another piece of wood behind it), continue cutting until you’ve cut through all layers.
Can You Put Baseboard Over Baseboard
If you’re wondering if you can put baseboard over baseboard, the answer is yes! This is a great way to add new life to tired, old baseboards. Simply remove the old baseboards and install new ones right over top.
It’s an easy project that anyone can do in just a few hours.
Clever Hacks for Cutting Baseboards
Finally, I want to share with you techniques for cutting plinths.
Of course, cutting baseboards may not be an easy task, but here are some tricks to help you cut baseboards with ease:
- Measure twice, cut once: this timeless advice also applies to cutting baseboards. It is better to use a tape measure and mark the cut points with a pencil.
- Use the right tools: having the right tools ensures you get a good result. We have already considered what these tools can be, so the choice is yours!
- Use a miter box for straight cuts: if you don’t have access to a miter saw, a miter box can be a budget-friendly alternative. Place the plinth in the box and use a hacksaw to make straight cuts at the right angles.
- To get smooth corners, use a protractor to measure the exact angle of the corner and adjust the miter saw accordingly.
- Supporting long skirting boards: for longer skirting boards, it is best to provide adequate support to prevent bending or warping during cutting.
- It is very important to take safety precautions: wear appropriate protective equipment such as safety glasses and earplugs. This will help avoid accidents! Happy cutting!

Conclusion
If you’re looking for a way to cut baseboards quickly and easily, a Dremel tool is a great option. Its small size and maneuverability make it easy to get close to the wall and make precise cuts. Plus, there’s no need for expensive power tools or saws.

I’m John Carry, also known as a woodworker I have been a professional saw expert for over 10 years. I’d work with every type of saw machine out there, and experiment to find which tools work better.
I’m always looking for ways to improve my skills and help those around me. I love my job and am always happy to share my knowledge with others.