A router is a versatile tool that can be used for a variety of woodworking projects. One of the most common uses for a router is cutting out shapes, such as circles, squares, and curves, in wood or other materials. Whether you’re a professional woodworker or a DIY enthusiast, learning how to use a router to cut out shapes can be a valuable skill to have in your arsenal. In this guide, we’ll walk you through the steps you need to follow to use a router to cut out shapes accurately and safely.
How to cut out shapes with a router
Cutting out shapes with a router can be a simple and efficient way to create precise and clean cuts in wood, plastic, or other materials. Here are the steps you can follow to use a router to cut out shapes:
- Choose the right router bit: Select a router bit that is appropriate for the shape you want to cut out. For example, a straight bit is ideal for cutting straight lines, while a round-over bit can create rounded edges.
- Secure the material: Clamp the material securely to a workbench or table to prevent it from moving during the routing process.
- Set the depth of cut: Adjust the depth of the router bit to the thickness of the material. Make sure to set the depth in small increments to avoid cutting too deeply in one pass.
- Mark the shape: Use a pencil or a template to mark the outline of the shape you want to cut out on the material.
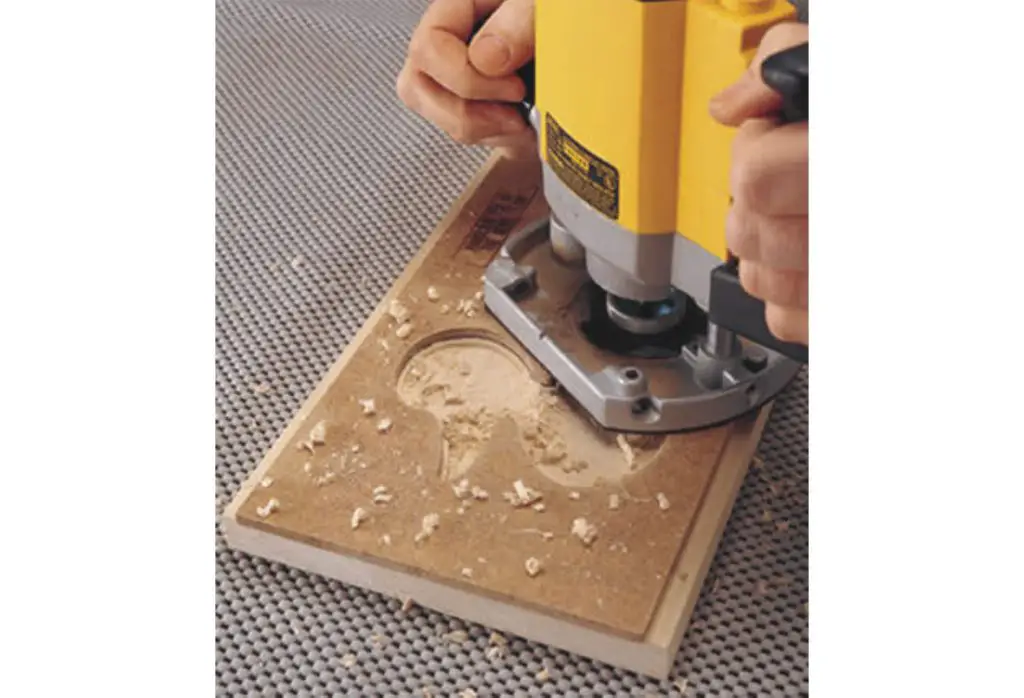
- Start routing: Turn on the router and begin cutting along the marked outline. Use a steady and consistent motion to achieve a clean and smooth cut. Remember to keep both hands on the router at all times and wear appropriate safety gear.
- Finish the cut: Once the shape is fully cut out, turn off the router and remove the material from the workbench. Sand the edges of the cutout shape to smooth any rough spots.
By following these steps, you can use a router to cut out shapes with precision and accuracy. Remember to always practice safe routing techniques and wear appropriate safety gear to avoid any accidents.
How Do You Cut Out With a Router?
Assuming you would like a step-by-step guide on how to cut out with a router: 1. Gather your materials. You will need a router, a straight edge, and clamps.
2. Set up your work area. Make sure you have a flat surface to work on and that the area is well-lit.
3. clamp your straight edge to the work surface. This will act as a guide for the router bit.
4. Select the appropriate router bit for the job at hand. A common choice for cutting out is a flush trim bit, but there are many different types of bits available depending on the desired outcome.
5. Attach the chosen router bit to the router according to the manufacturer’s instructions. Be sure that the bit is secured tightly in place before proceeding.
6. Place the router against the straight edge so that the spinning cutter is lined up with where you want to make your cut.
7. Slowly and steadily move the router forward, following along the straight edge until you have reached the end of your cut line. Apply even pressure throughout this process
8. Once you have reached the end of your cut line, carefully remove the router from the work surface.
9. Remove the straight edge and clamps then inspect your work to ensure that the router has made a clean cut Congratulations!
How Do You Cut Intricate Shapes in Wood?
There are a few ways to cut intricate shapes in wood. One way is to use a jigsaw. A jigsaw is a powerful tool that has a blade that can be changed out to different sizes and shapes.
This makes it ideal for cutting curves and other intricate shapes. Another way to cut intricate shapes in wood is to use a router. A router is also a powerful tool that has an interchangeable bit.
The router bits come in all sorts of different sizes and shapes, making them perfect for cutting detailed patterns into wood.
What Shapes Can You Make With a Router?
There are many shapes that you can make with a router. The most common shapes are circles, squares, and rectangles. You can also make more complex shapes such as hearts, stars, and animals.
Can You Carve With a Router?
A router is a tool that can be used for a variety of woodworking tasks, including carving. While routers are most commonly used to create smooth, even surfaces on wood, they can also be used to carve detailed designs and patterns. To carve with a router, you will need to attach a carbide-tipped bit to the router.
The type of bit you choose will depend on the size and depth of the carving you want to create. For smaller carvings, you can use a straight bit or a spiral flute bit. For larger carvings, you may need to use a rabbeting bit or even a core box bit.
Once you have chosen the appropriate bit for your project, you will need to set up the router so that it is able to move freely along the surface of the wood. You will also need to determine how deep you want the carving to be and adjust the height of the router accordingly. Once everything is set up, you can begin routing your design into the wood.
Routing can be tricky and takes some practice to master. But with patience and practice, anyone can learn how to rout like a pro!
Using A Router To Cut Shapes & Clean Out Holes
How to Use a Router to Cut Patterns
Routers are one of the most versatile tools in a woodworker’s arsenal. With the right bit, they can cut perfect circles, rabbets, and even intricate patterns. Here’s how to use a router to cut patterns.
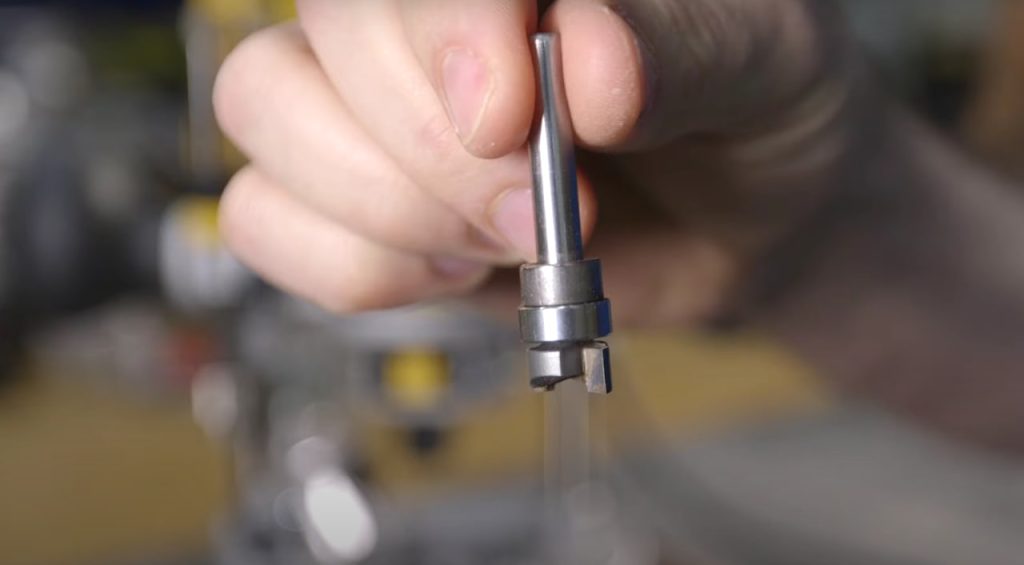
1. Select the right bit. For cutting patterns, you’ll need a spiral up-cut or down-cut bit with a ball-bearing guide. The ball-bearing guide ensures that your cuts are clean and precise.
2. Set up your router table. If you don’t have a router table, you can use a hand-held router upside down on a piece of scrap wood clamped to your work surface. Just be sure that your setup is sturdy and won’t move around while you’re routing.
3. Attach your pattern to the workpiece with double-sided tape or spray adhesive. Be sure that your pattern is centered on the workpiece before attaching it.
4. Secure the workpiece to the router table using clamps or stops attached to the fence. This will prevent your workpiece from moving while you route.
5. Start cutting! Slowly feed your workpiece into the spinning bit, following along the edge of your pattern. Take care not to go too fast, as this can cause burning or tear-out.
6. Finish up by sanding away any rough edges left behind by the router bit. And that’s all there is to it! Now you know how to use a router to cut patterns like a pro.
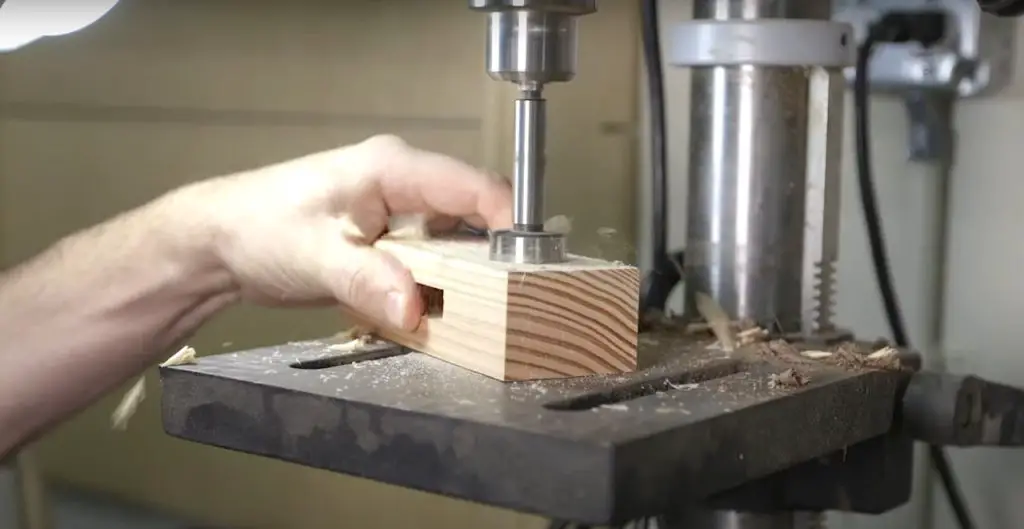
How to Use a Router to Cut a Groove
If you’re looking to add some decorative detail to your woodworking projects, routing a groove is a great way to do it. Here’s a quick guide on how to use a router to cut a groove:
1. Set up your router with the appropriate bit. For most grooves, a ¼” or ½” straight bit will work fine.
2. Measure and mark out the area where you want the groove to be cut. Use a pencil or chalk to make sure the lines are visible.
3. Set the depth of cut on your router according to how deep you want the groove to be. For shallow grooves, start with a shallower depth of cut and gradually increase it until you reach the desired depth.
4. With the router turned off, position the bit at one end of the marked line and align it with the center of the line.
5. Turn on the router and slowly guide it along the marked line, keeping an even pressure as you go. Be careful not to veer off course – keep your hands steady and let the router do its work! If necessary, pause periodically so that you can check your progress and adjust accordingly.
Cutting With a Router
Whether you’re a professional woodworker or a DIY enthusiast, having a router in your toolkit is essential. A router is a versatile tool that can be used for everything from shaping edges to creating intricate designs. If you’re new to using a router, the prospect of cutting with one can be daunting.
But with a little practice, you’ll be an expert in no time! In this blog post, we’ll show you everything you need to know about cutting with a router. First, let’s talk about the different types of cuts you can make with a router.
Type of Cut
The most common type of cut is called a straight cut. This is when you move the router along a straight line, making evenly spaced cuts along the way. Another type of cut is called an angled cut.
This is when you tilt the router so that it’s not perfectly perpendicular to the surface you’re working on. Angled cuts are great for adding interest to straight edges or for creating beveled edges on pieces of wood. Finally, there’s the spiral cut.
This is when you move the router around in circles while simultaneously moving it forward (or backward). Spiral cuts are often used for decorative purposes and can add some real flair to your work! Now that we’ve covered the different types of cuts, let’s talk about how to actually make them.
When making straight cuts, it’s important to use a guide – like a piece of scrap wood or masking tape – to ensure that your cuts are even and consistent. To make an angled cut, simply tilt the router until it’s at the desired angle and then follow your chosen line. For spiral cuts, start by making small circles and then gradually increase the size of your circle as you move forward (or backward).
Remember – take your time and go slowly!
Router Bits
Router bits are cutting tools that are used to create shapes and designs in wood. There are many different types of router bits available, each designed for a specific purpose. The most common type of router bit is the straight bit, which is used to create straight lines and edges.
Other popular types of router bits include round-over bits, chamfer bits, and rabbeting bits. Router bits are typically made from high-speed steel or carbide and can be either hand-held or table-mounted. When choosing a router bit, it is important to select one that is the correct size and shape for the job at hand.

I’m John Carry, also known as a woodworker I have been a professional saw expert for over 10 years. I’d work with every type of saw machine out there, and experiment to find which tools work better.
I’m always looking for ways to improve my skills and help those around me. I love my job and am always happy to share my knowledge with others.